Webhooks
Webhooks push real-time notifications to your server whenever something happens in Interline — a message arrives, a delivery status changes, a contact is updated — so you don't have to poll the API.
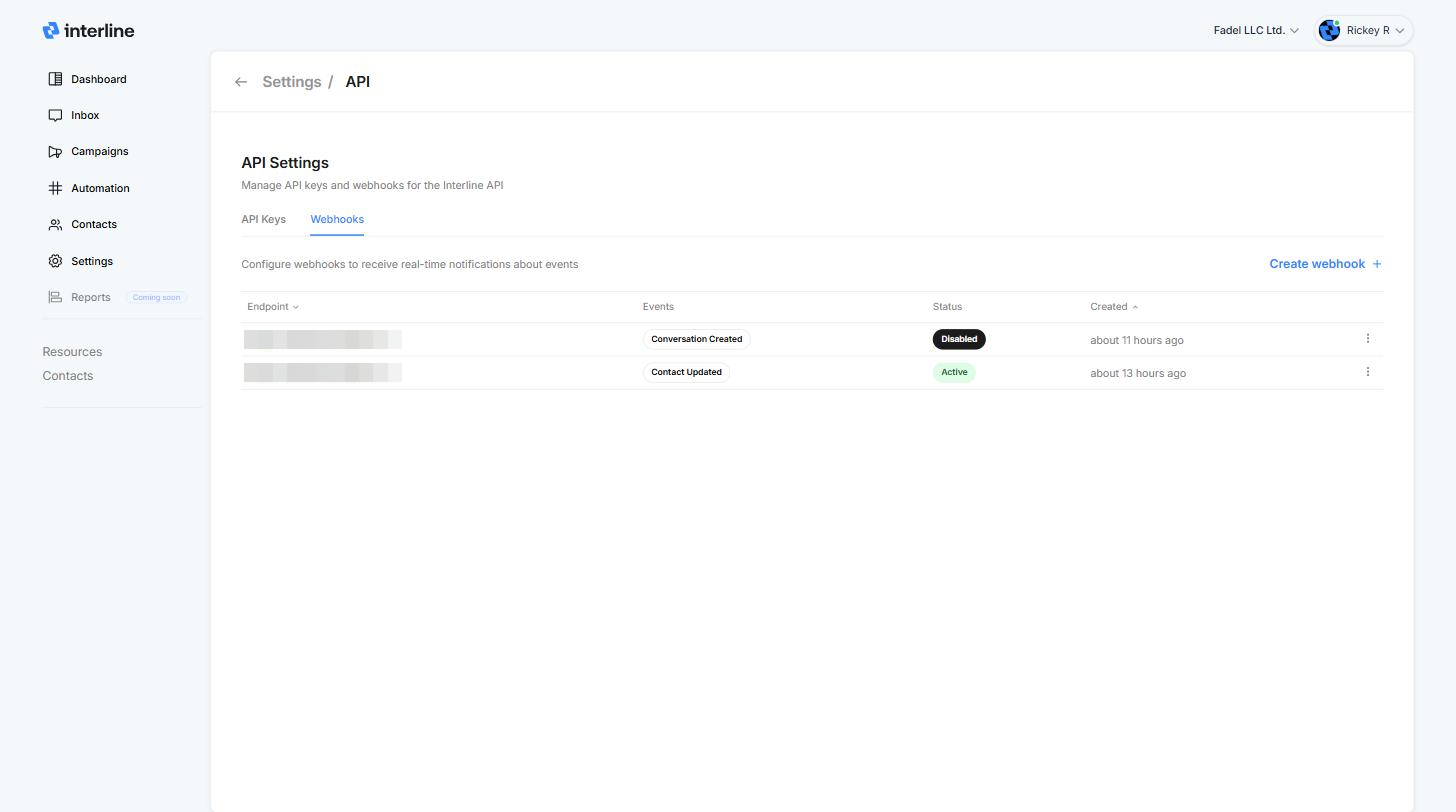
Manage them from the Webhooks tab in Settings → API. The list shows each endpoint, the events it subscribes to, its status, and when it was created.
Add a webhook
- Go to Settings → API and open the Webhooks tab.
- Click Create webhook.
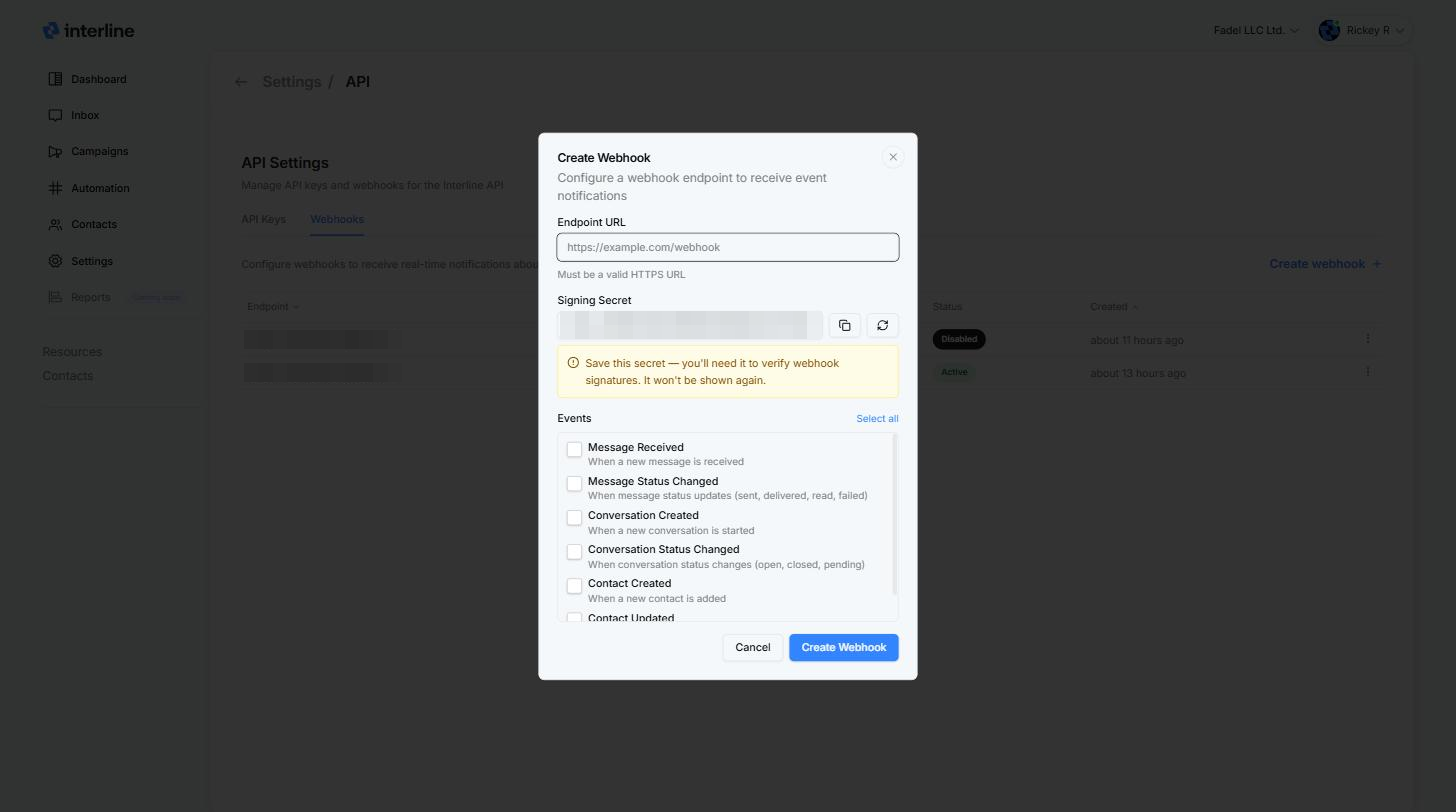
- Enter your Endpoint URL — it must be a valid HTTPS URL.
- Copy the Signing Secret and store it safely (see below).
- Tick the Events you want delivered to this endpoint (or Select all).
- Click Create Webhook.
Save the signing secret — it's shown only once
The signing secret is what your server uses to verify that incoming webhook requests really came from Interline. Copy it before saving — it won't be shown again. Use the refresh button in the dialog to generate a new one if needed.
Events
| Event | Fires when |
|---|---|
| Message Received | A new message is received |
| Message Status Changed | A message's status updates (sent, delivered, read, failed) |
| Conversation Created | A new conversation is started |
| Conversation Status Changed | A conversation's status changes (open, closed, pending) |
| Contact Created | A new contact is added |
| Contact Updated | A contact's information is modified |
Manage webhooks
From the Webhooks list, use the ⋮ menu on any endpoint to disable, edit, or delete it. Disabled webhooks stay configured but stop receiving events until re-enabled.
Webhooks can also be managed programmatically — see the webhook endpoints in the API Reference (requires a key with the Read webhooks / Write webhooks scopes).
Payloads & verification
Delivery payload formats and signature verification details are documented in the Receiving webhooks section of the API Reference.